To install landscape edging, mark the border, dig a narrow trench, set the edging so about half an inch shows above the soil, secure it with stakes, and backfill. Test the line and level before you pack the soil. Plan on at least half a day for a typical bed.
This guide is for homeowners who want to do the job themselves, or who want to know how it works before they hire help. You will learn which edging fits your yard, the tools you need, and trench sizes for plastic, metal and stone. It also covers San Diego County digging rules and soil.
Key Takeaways
- Call 811 at least two working days before you dig. It is free. DigAlert handles San Diego County.
- Pick the edging by its job first: mow strip, mulch holder or grass barrier. Pick the look second.
- Trench depth depends on the material. Plastic and rubber need 3 to 4 inches. Edging stones need about 4 to 5 inches plus sand.
- Keep the top about half an inch above the soil. Go lower where a mower rolls over it.
- Test-fit the edging, then check the line, level and lean before you backfill.
- Plastic, rubber, metal and stone suit most DIY homeowners. Poured concrete curbing is a pro job.
What Is Landscape Edging and Why Does It Matter?
Landscape edging is a border that separates two parts of a yard, such as a lawn and a flower bed. It keeps mulch, soil, gravel and grass where you want them.
Edging does four jobs:
- Holds loose material. Mulch and soil stay in the bed instead of washing onto the lawn or path.
- Blocks grass creep. Grass and weeds have a harder time moving into the bed.
- Speeds up mowing. With installed edging, you can mow right up to the edge instead of trimming by hand.
- Gives clean lines. A sharp border makes a yard look finished.
The install matters more than the material. Edging that leans, sits too high or sits too low fails fast. Angi notes that edging set too high is a tripping risk, and edging set too low will not hold the ground cover in. This guide shows you how to get the height right.
Which Type of Edging Is Right for Your Yard?
Pick edging by the job it must do. Then think about budget and skill. The material comes last.
Ask three questions before you shop:
- Will a mower run along it? If yes, the top must sit low enough for a mower wheel to roll over it, as Home Depot advises.
- Must it hold mulch or gravel? Then the top must stand a little above the fill, or the material will spill out.
- How long should it last? Plastic is cheapest and has the shortest life. Rubber lasts longer. Pavers cost the most up front and last roughly 25 to 50 years or more, per Home Depot.
This table compares the common options.
Edging type | Best for | Difficulty | Trench or base | DIY or pro |
No-dig plastic or metal panels | Quick borders, gentle curves | Easiest | No trench. Pound in stakes. | DIY |
Plastic or rubber roll | Curves, tight budgets | Easy to moderate | 3 to 4 in. deep, 1 to 2 in. wider than the edging | DIY |
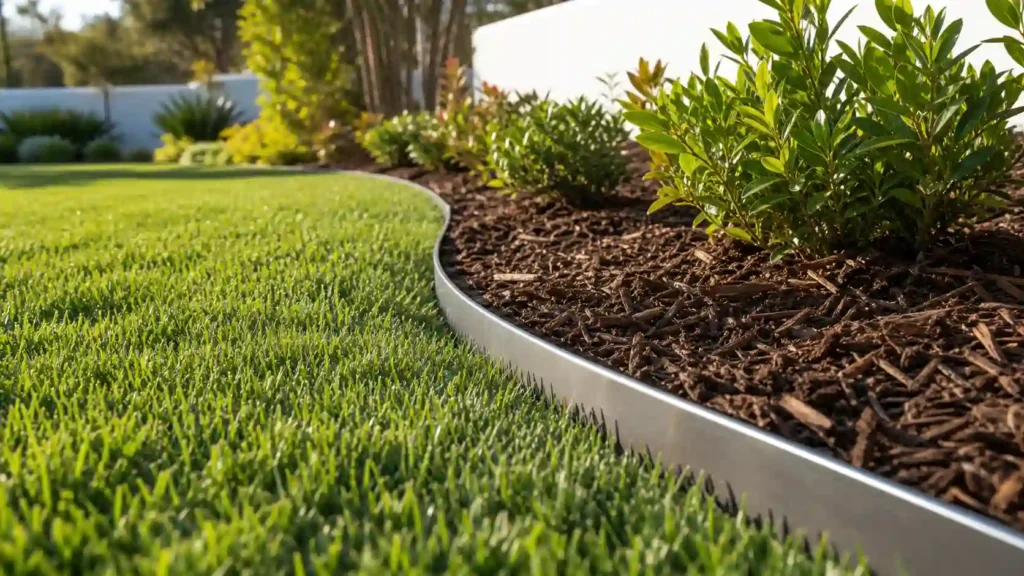
Metal (steel or aluminum) | Thin, clean lines | Moderate | Edging height minus 1/2 in. exposed, plus 1/2 in. sand | DIY |
Edging stones | Permanent, natural look | Hard | About 4 to 5 in. deep, with about 2 in. of leveling sand | DIY with time and effort |
Pavers or brick | Formal, long-lasting borders | Hard | About 2 in. deeper and wider than the paver, plus 1 in. packed sand | DIY or pro |
Poured concrete curbing | Fixed, permanent shapes | Hardest | Forms and concrete mix | Pro |
Sources: difficulty follows LawnStarter’s descriptions. Trench sizes come from Home Depot, Angi and Hunker. HomeAdvisor says poured concrete is complex and needs a pro.
Stone, brick and pavers belong to hardscaping, a bigger topic of its own. Read what hardscaping includes if you plan a patio or path as well.
What Tools and Materials Do You Need?
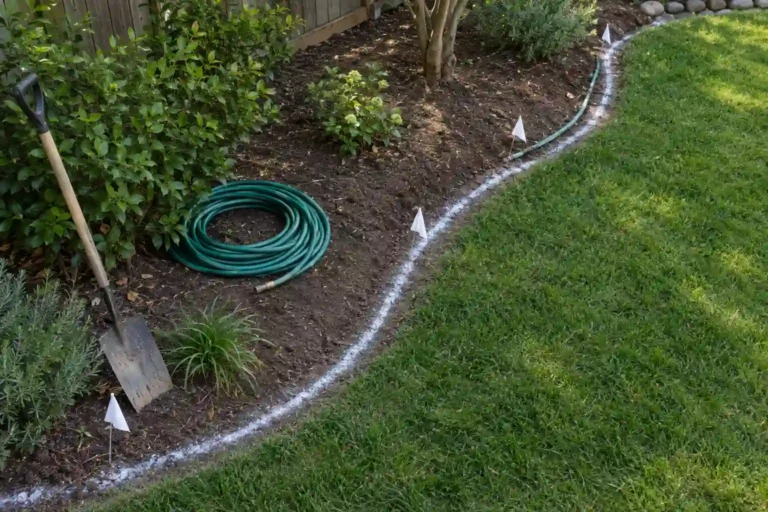
Most trench jobs need a spade, a rubber mallet, a level, string and the edging itself. Add a few items for each material.
Core kit:
- Flat spade, round point shovel or half-moon edger
- Rope, twine or a garden hose, plus marking paint
- Tape measure and a level
- Rubber mallet
- Garden shears for plastic, a handsaw for metal, pruning shears for small roots
- Edging, stakes or spikes, and connectors if your roll needs them
- Garden rake, work gloves and safety glasses
Add for stone: mason line and stakes, leveling sand, a tamper, a hoe and a stone chisel.
Use a rubber mallet, not a steel hammer. Angi warns that a regular hammer dents metal edging and can break plastic stakes. Buy about 10 percent more edging than you measure. Home Depot recommends this to cover waste.
What Should You Do Before You Dig?
Call 811, mark your line and check your soil. These three steps prevent costly surprises.
Do you need to call 811 for a shallow trench?
Yes, even a shallow trench needs a call. California law covers anyone who moves earth with tools, per the California Underground Safety Board. SDG&E says gas and electric lines can run under streets, sidewalks and even your yard.
The Contractors State License Board says to call at least two working days, but not more than 14 days, before you dig. In San Diego County the call goes to DigAlert. Follow these steps:
- Mark the dig line with white paint or flags.
- Call 811 or submit a request at DigAlert.
- Wait until utility owners mark their lines or tell you the area is clear.
Utility crews mark their own lines. Trace your sprinkler pipes and lighting wires yourself before you cut a trench along a bed.
How do you plan and mark the border?
Lay a garden hose or rope along the planned border. Move it until the curve looks smooth from several angles. The Royal Horticultural Society suggests viewing the marked edge from different angles. It also notes that broad, sweeping curves are easier to keep than tight, complex ones.
Trace the hose with marking paint. Then measure along the hose, not in a straight line. Add 10 percent for waste.
How does San Diego soil change the job?
Much of San Diego County has heavy clay. Water News Network reports that a shovel in the county is likely to meet impermeable soil. Clay is hard to dig, and rock-hard ground makes trenching far harder.
Hunker advises installing landscape edging when the soil is wet and soft. Water the line lightly the day before you dig. Do not soak it. Soggy clay sticks to the spade and slows you down.
Before you dig, pull up any weed fabric along the line. Cut small roots in the trench with pruning shears.
How to Install Landscape Edging, Step by Step
These eight steps work for any trench-style edging. Notes for each material follow.
- Call 811 and wait for the marks. Do not dig until the notice period ends.
- Mark the line. Trace your hose or rope with paint, then move the hose aside.
- Cut the trench. Use a flat spade or half-moon edger. Keep the wall nearest the lawn as vertical as you can, so the edging stands straight, as Hunker explains. A slanted wall makes edging lean.
- Size the depth with a formula. Dig depth = edging height – exposed height + base layer. For 4-inch metal edging with 1/2 inch showing and 1/2 inch of sand, that is 4 – 0.5 + 0.5 = 4 inches. For a plastic roll with no sand, follow the package. Home Depot lists 3 to 4 inches.
- Test-fit before you commit. Lay the edging in the dry trench. Slice the wall or clear debris until it seats well.
- Set the height. Keep the top no more than about 1/2 inch above the ground. Angi says plastic can show 1/2 to 1 inch. Go lower where a mower rolls over it.
- Secure and join. Drive stakes or spikes with a rubber mallet. Join runs with the connectors that came with the edging.
- Backfill, tamp and water. Fill both sides with the soil you saved. Press it down with your foot, then water lightly. Add soil to low spots, tamp, water again and rake smooth.
How to Install Plastic Landscape Edging
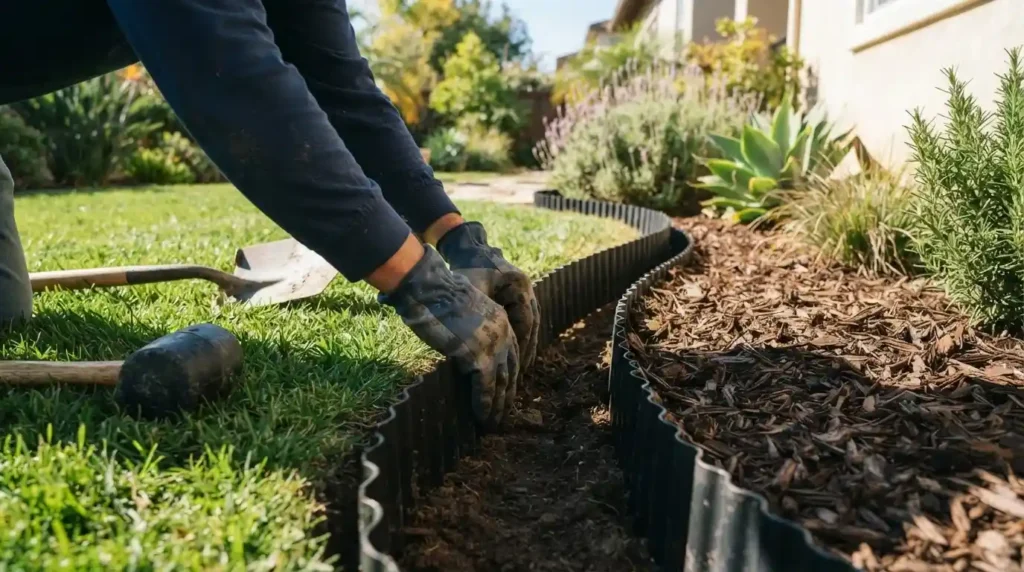
Uncoil the roll, set it in a 3 to 4 inch trench, stake it from the bed side and backfill. This is how to install plastic edging in a roll.
- Let the roll sit in the sun for about an hour to relax the coil, per Angi. If it curls back, weigh the ends with a light object. Skip this for a round bed.
- Dig 3 to 4 inches deep and 1 to 2 inches wider than the edging.
- Face loops or curls toward the lawn. Angled lips face away from it.
- Drive stakes from inside the bed with a rubber mallet. Stake spacing differs by product, so follow the package.
- Put joints toward the middle of a run, not at the ends.
Angi estimates at least two hours and $25 to $100 in total for a small bed.
How to Install Metal Landscape Edging
Dig a narrow trench, add a thin sand layer, set the edging so about half an inch shows, and drive stakes every 3 to 4 feet. These numbers come from Angi’s metal edging guide.
- Standard metal edging is 3 or 4 inches tall.
- Spread about 1/2 inch of sand in the trench and pack it by hand.
- Cut with a handsaw, before you install or as you go.
- Use a mallet. A regular hammer dents the metal.
- File down or fold over sharp top edges, especially around children.
- Steel is tougher to cut and shape than aluminum.
- Joining methods vary by brand, so follow the maker’s instructions.
How to Install Edging Stones
Set a string line, dig a trench about 4 to 5 inches deep, tamp in about 2 inches of sand, then set and level each stone. This follows Hunker’s stone edging guide.
- Hammer stakes in at both ends and tie a mason line at the finished height. On curves, mark the path with a hose or paint. The string need not be level. It should stay a steady height above the ground.
- Dig the trench and tamp the bottom flat.
- Add the leveling sand. Smooth it with a hoe and tamp it firmly.
- Start in the most visible spot and work toward the least visible. Cut stones then end up out of sight.
- Tap each stone with a rubber mallet. Check level side to side, front to back and against its neighbors.
- Leave no gaps. Gaps let grass and weeds break through.
- Backfill. Landscape fabric behind the stones is optional. It stops soil from seeping through.
Set stone, brick, and pavers sunk into the ground along a mowed edge. A raised border is harder to trim, as Total Landscape Care advises.
How Do You Handle Curves, Slopes and Roots?
Use gentle curves, keep the height steady, and move the line around thick roots.
- Curves. Plastic and rubber rolls bend well, per Home Depot. Broad sweeps are easier to build and to mow than tight bends.
- Slopes. Follow the ground, but keep the top at a steady height above the soil. A mason line makes this easy.
- Roots. Cut small roots with pruning shears. If you hit a thick root, shift the line instead of chopping it.
- Sprinklers. Keep edging clear of heads and pipes. Dig by hand near them.
What Are the Most Common Installation Mistakes?
Most failures trace back to a rushed trench, the wrong height or a skipped test fit.
- Slanted trench walls. The edging leans and never stands straight.
- The wrong height. Too high is a tripping risk. Too low lets mulch spill out.
- No test fit. The edging seats poorly and shifts later.
- Buying too little. Measure along the curve, not in a straight line, and add 10 percent.
- Using a steel hammer. It dents metal edging and breaks plastic stakes.
- Leaving sharp metal tops. File them down or fold them over.
- Leaving gaps in stone rows. Weeds and grass root in the gaps.
- Skipping 811. SDG&E warns that damaged lines can mean serious injury, heavy fees and project delays.
Best Practices and a Final Checklist
When installing garden edging, finish with a Line, Level, Lean check, then run the mower along the edge.
- Line: Stand back and look from three spots. Curves should flow with no kinks.
- Level: Check the top height every few feet with a level or string.
- Lean: The edging should stand straight, not tilt toward the lawn or the bed.
A few habits help on any job:
- On long runs, backfill each section every few feet as you go.
- If you choose plastic, pick heavy-duty thickness. LawnStarter notes it handles mower bumps better.
- If a mower wheel catches the edge on your test pass, lower the edging.
Final checklist:
- 811 notice made and marks in place
- Sprinkler and lighting lines traced
- Border marked and viewed from several angles
- Length measured along the curve, plus 10 percent
- Soil soft, weed fabric pulled, small roots cut
- Trench wall vertical on the lawn side
- Depth checked with the formula
- Edging test-fitted before backfill
- Top set about 1/2 inch above the soil, or lower for mowing
- Backfilled, tamped and watered
- Line, Level, Lean check done
Two Worked Examples
These are typical cases with real arithmetic. Swap in your own numbers.
Example 1: A curved mulch bed with plastic edging. Your hose around the bed measures 34 feet. Add 10 percent: 34 x 1.1 = 37.4, so buy a 40-foot roll. Dig 3 to 4 inches deep. Let the roll warm in the sun for an hour, then stake it from inside the bed. Plan on at least two hours, based on Angi’s estimate for plastic.
Example 2: A straight path border with 4-inch metal edging. The run is 20 feet. The depth formula gives 4 – 0.5 + 0.5 = 4 inches. At one stake every 3 to 4 feet, you need roughly 6 to 8 stakes. Set them with a mallet, then file the top edges.
Should You Install Edging Yourself or Hire a Pro?
Do plastic, rubber, metal and most stone edging yourself. Hire a pro for poured concrete, long runs that need grading, or work near buried lines.
Pros cost more but save time. LawnStarter reports installed costs of $3.50 to $8.80 per linear foot. On a 100-foot run, that is $350 to $880. A DIY plastic job runs about $25 to $100 in total, per Angi. These are national averages, so local quotes will differ.
A pro makes sense when:
- You want poured concrete curbing, which needs forms and cure time.
- The ground needs heavy grading or the curves are tight.
- The edging ties into a patio, pavers or a retaining wall.
- You lack the time, tools or a strong back.
SD Home Turf provides landscaping services in San Diego County. If you want a straight answer on edging for your yard, request a quote.
Conclusion and Next Steps
Now you know how to install landscape edging so it stays level, holds its line and survives mowing. Pick the edging by its job, call 811, test-fit before you backfill, and finish with the Line, Level, Lean check.
Your next steps:
- Choose your edging with the three-question test.
- Call 811 now, since the notice period is two working days.
- Mark the border, measure along it and add 10 percent.
- Block out a half day once the soil is soft.
FAQs
How deep should you dig for landscape edging?
It depends on the edging. Plastic and rubber rolls usually need a trench 3 to 4 inches deep. Metal edging needs a depth equal to its height minus the exposed part, plus any sand layer. Edging stones need about 4 to 5 inches with sand beneath. Always check the package for deeper profiles.
How high should landscape edging sit above the ground?
About half an inch for most edging. Home Depot says the top should be no more than 1/2 inch above ground, and Angi says plastic can show 1/2 to 1 inch. Where a mower rolls over the edge, set it lower. Too high is a tripping risk. Too low lets mulch spill.
What is the easiest landscape edging to install?
No-dig panels are the easiest. You pound stakes into the ground and skip the trench, per LawnStarter. Plastic and rubber rolls come next. They need a shallow trench but bend around curves. Stone and pavers take more time and skill. Poured concrete usually needs a professional.
How far apart should edging stakes be?
For metal edging, drive stakes every 3 to 4 feet, according to Angi. Spacing for plastic and rubber varies by product, and Home Depot tells readers to follow the maker’s guide. Check the package before you buy stakes. Drive all stakes with a rubber mallet so you do not dent or break them.
Do you need to call 811 before installing edging?
Yes, if you will dig. California law covers anyone who moves earth with tools. Call 811 at least two working days, but not more than 14 days, before you dig. In San Diego County, DigAlert takes the request. Mark the area with white paint first. The call is free, and you wait for the utility marks.
How long does it take to install landscape edging?
A small plastic edging job takes at least two hours, says Angi. LawnStarter says a typical bed takes at least half a day, depending on its size. Stone and pavers take longer because you dig deeper, add sand and set each piece level. Allow extra time for dry clay and for the 811 wait.