...

SD Home Turf

4.8
(90 Ratings & Reviews)

Artificial Turf Installation

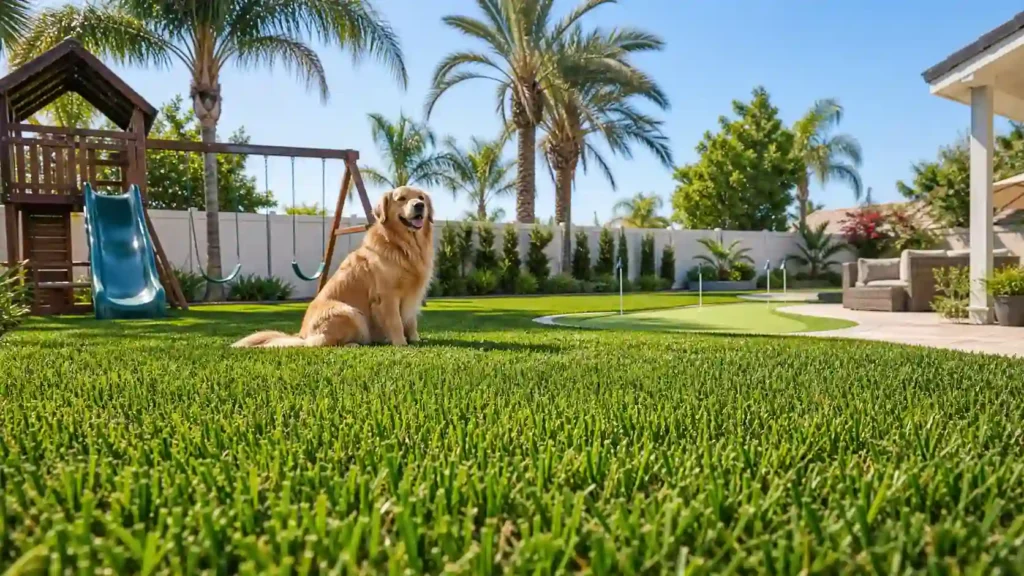
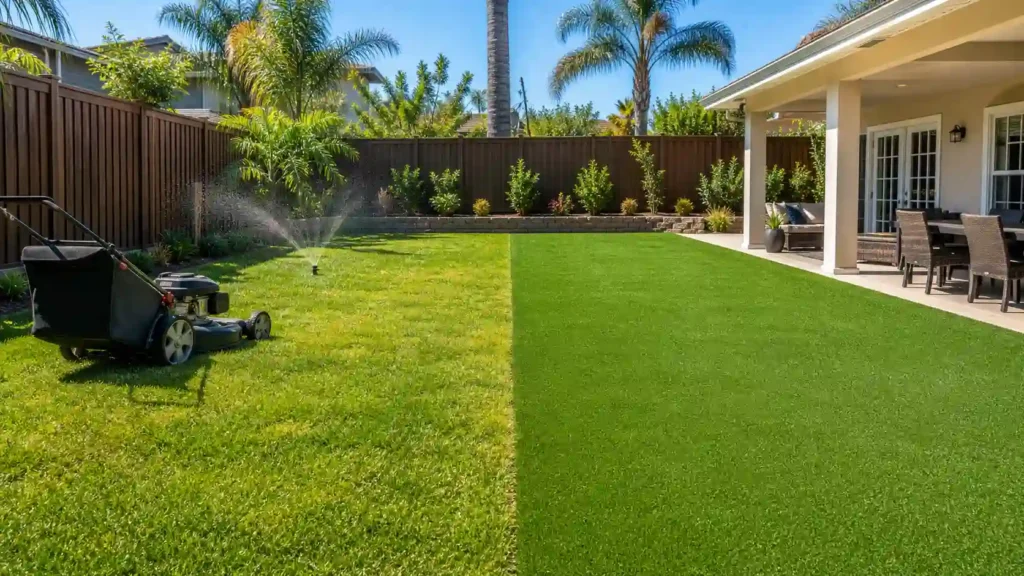
Backyard with green artificial turf and patio seating, showing the pros and cons of artificial turf for a real San Diego home.
Residential Backyard Artificial Turf

Pros and Cons of Artificial Turf for Your Backyard

Artificial turf can make a backyard easier to use with less mowing and routine watering. But the trade-off includes a higher upfront cost, heat, drainage needs, ongoing care, and eventual replacement. The right choice depends on what you want from your yard. These pros and cons of artificial turf can help you decide before you invest. The Pros of Artificial Turf Less Mowing and Routine Lawn Work One of the biggest advantages is simple: artificial turf does not grow. You do not need to mow it every week during the growing season. There is also no grass height to manage or lawn equipment needed for routine cutting. That can reduce the time spent on basic lawn care. You also avoid tasks tied to natural grass growth, such as regular mowing and trimming. Artificial turf still needs some care, but the work is different. Instead of cutting grass, you mainly deal with debris, cleaning, brushing, and occasional spot care. For homeowners who dislike weekly lawn work, this can be a major practical benefit. Reduced Watering Artificial turf does not need routine irrigation to stay green. Natural grass needs water to grow and maintain its appearance. Synthetic grass does not have that same water demand because the blades are not living plants. This can reduce the amount of water used for routine lawn irrigation. It can also make the backyard easier to manage during periods when watering is restricted. The key point is that reduced watering does not mean zero water use. You may still rinse the surface when cleaning is needed. Water may also be required for certain cleaning tasks or to remove dust and debris. So, when comparing artificial turf pros and cons, think of water reduction as a lower routine demand rather than a complete end to water use. Consistent Appearance Natural grass can change with weather, growth, mowing, watering, and other lawn conditions. Artificial turf provides a more consistent surface appearance. Its turf blades stay in place instead of growing taller between cuts. A properly selected and installed product can maintain a uniform green look across the yard. The result still depends on turf quality and installation. Poor seams, uneven preparation, worn areas, or poorly maintained blades can affect the final appearance. Artificial turf is not automatically attractive just because it is synthetic. Product quality and installation still matter. Durable for Regular Backyard Use Artificial turf can handle regular foot traffic and common backyard activity without the same growth and recovery cycle as natural grass. That makes it useful for yards used for play, outdoor activities, walking, or general family use. Durability does not mean the surface cannot wear. Heavy traffic can flatten turf fibers over time. Sun exposure, use patterns, product quality, and maintenance can also affect performance. This is an important distinction when considering the pros and cons of artificial turf grass. A durable lawn surface can reduce common wear problems, but no turf system lasts forever. More Usable Backyard Conditions Natural grass can become muddy or worn when it receives heavy use or wet weather. Artificial turf provides a more predictable surface for everyday backyard use when the system has been installed correctly. That can make the yard easier to use for outdoor living, play, and regular foot traffic. The benefit is not that artificial turf makes every backyard usable under every condition. Drainage, grading, soil, and installation quality still matter. The main advantage is a consistent finished surface that does not depend on grass growth. The Cons of Artificial Turf Higher Upfront Installation Cost The biggest financial drawback is the initial investment. Artificial turf costs more upfront than simply maintaining an existing lawn. The total project can include turf, labor, site preparation, base materials, infill, edging, removal, and other work needed for the property. Current published U.S. estimates show why prices can vary widely. Angi reported an average artificial turf installation cost of about $5,800 in 2026, with typical pricing around $3 to $11 per square foot. Other published estimates put professionally installed projects at a wider range depending on preparation and project conditions. These figures are useful for planning, not as a quote for your backyard. A small, simple yard can have a very different cost from a large yard with difficult access, poor drainage, slopes, or extensive preparation. The important decision is whether the higher upfront cost fits your budget and whether the lower routine lawn workload justifies that investment for your use. Artificial Turf Can Get Hot in Direct Sun Synthetic fibers absorb heat differently than living grass. Under strong, direct sun, turf surfaces get noticeably hotter than a natural lawn does at the same time of day. University turf research has recorded synthetic surface temperatures well over 140°F on hot, sunny days, compared to 90–100°F for natural grass nearby. That’s a real difference if you’re walking barefoot, letting kids play at midday, or have a dog that spends a lot of time outside. Shade, time of day, and turf color all affect how much this matters for your yard. Full-sun backyards in San Diego County feel this more than shaded or coastal spots. Drainage Still Has to Be Planned Turf doesn’t remove the need for drainage. It changes how water needs to move through the system. Water has to pass through the turf backing, into the base layer below, and away from the yard. That only works if the site was graded correctly and the base was built right before the turf ever went down. Skip that step, or get it wrong, and you end up with pooling water sitting on top instead of soaking through. This is one of the most common installation mistakes, and it’s almost always avoidable with proper planning up front. Learn more about how artificial turf drains water. It Still Needs Some Maintenance Artificial turf reduces lawn maintenance. It does not eliminate maintenance. Leaves, dirt, and other debris can collect on the surface. Occasional rinsing can help remove dust and surface debris. Turf may

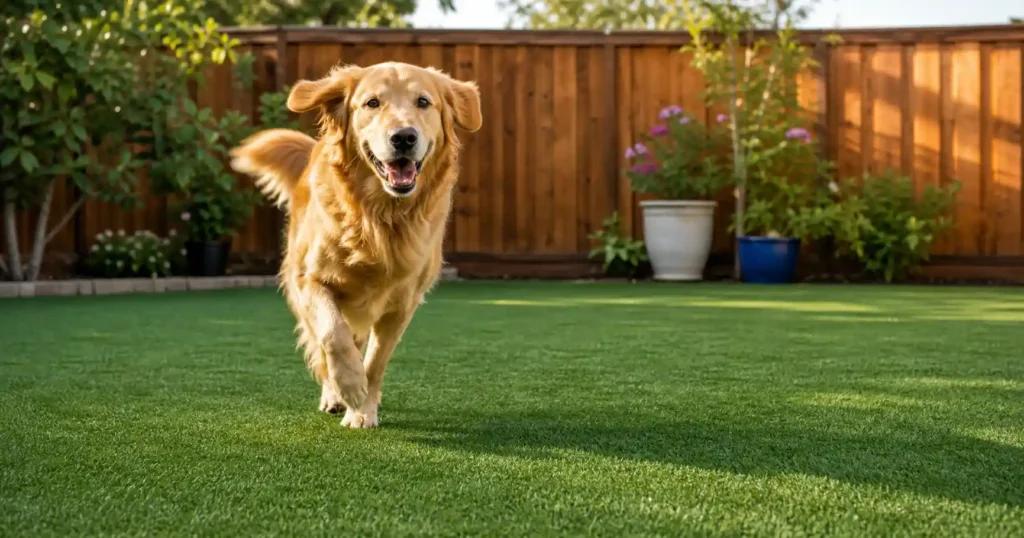
Benefits of Artificial Turf for a Residential Backyard shown in a modern yard with a stone patio, seating area, and lush green lawn
Residential Backyard Artificial Turf

Benefits of Artificial Turf for a Residential Backyard

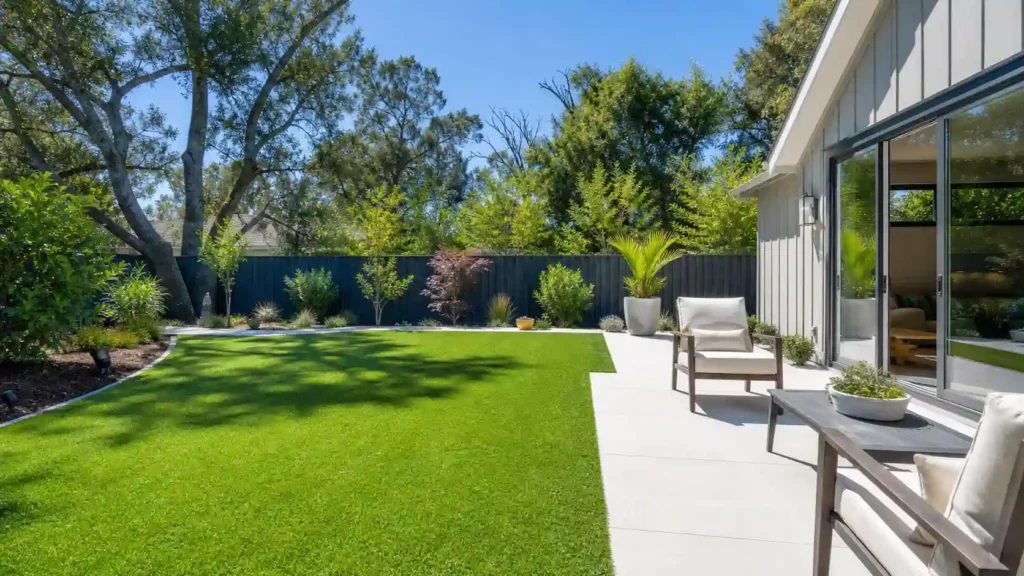
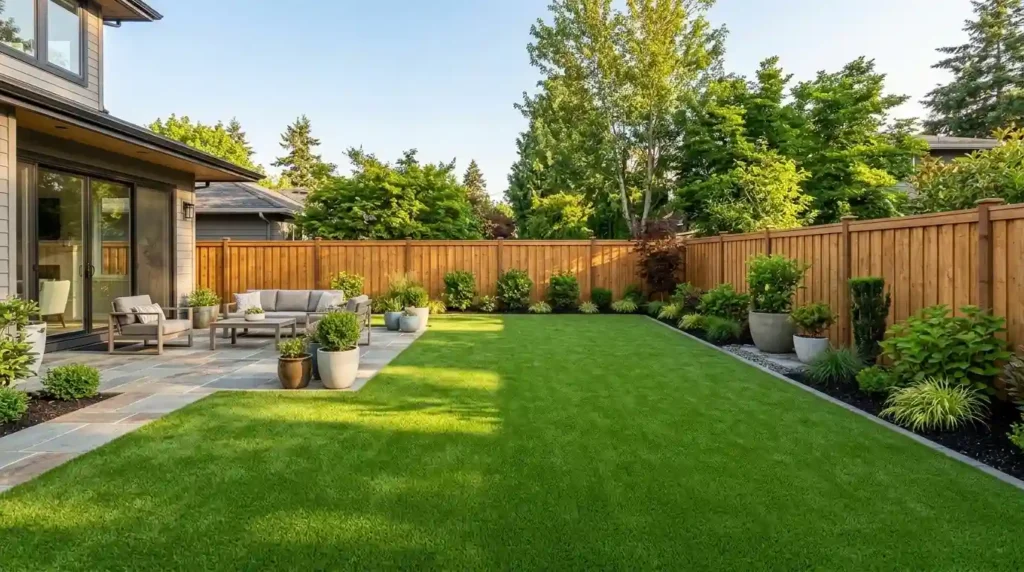
Homeowners often want a backyard that looks good without demanding constant lawn care. The benefits of artificial turf for a residential backyard include less routine upkeep, lower lawn water use, a steady green appearance, and a surface that is easier to use. Artificial turf can also give families, children, and pets a more dependable outdoor area. When planned well, it can fit with planting beds, patios, pathways, and other parts of the backyard. This guide walks through exactly what changes when you switch, room by room and season by season. No fluff, just the real advantages of artificial turf for a residential yard. 1. Artificial Turf Reduces Backyard Maintenance One of the clearest benefits of artificial turf is the amount of routine lawn work it removes. Natural grass needs regular attention to stay green and full. That can include mowing, watering, fertilizing, edging, and reseeding. Homeowners also need lawn equipment and time to keep the grass from becoming overgrown or patchy. Artificial turf does not need regular mowing or routine lawn watering to keep its green appearance. You also do not need to reseed bare areas or maintain the lawn in the same way as natural grass. That does not mean the surface needs zero care. Leaves, dirt, and other debris still need to be removed, and an occasional rinse or brush can help keep the turf looking clean. The bigger difference is the type of work involved. Instead of managing a growing lawn, homeowners mainly maintain the finished surface. Good preparation also matters. A stable, well-prepared base helps the finished turf remain usable and even. If you want to understand that part of the process, see How to Prepare the Ground for Artificial Grass. Less lawn maintenance can mean more time for the backyard itself. 2. It Keeps the Backyard Looking Green Throughout the Year Natural grass goes dormant in cold weather and browns out in a dry summer. Artificial turf doesn’t follow the seasons. It holds a steady, even green color all year, with no bare patches from foot traffic or drought. This is one of the clearest benefits of artificial turf. You get full, consistent coverage in January and in July, without babying it through weather changes. Modern turf also looks more like real grass than older versions did. Manufacturers blend multiple blade colors, use varied blade shapes, and add a thatch layer underneath to mimic the texture of a natural lawn. UV-stable fibers keep that color from fading in direct sun year after year. 3. It Can Significantly Reduce Lawn Water Use A natural grass lawn needs water to remain alive and green. That usually means regular irrigation, with the amount changing based on grass type, weather, soil, and local conditions. Artificial turf does not need routine lawn irrigation to maintain its green appearance. Replacing a natural-grass backyard can therefore reduce the water normally used for watering that lawn. This matters because residential outdoor water use is a major part of household water demand in the United States. The U.S. Environmental Protection Agency says residential outdoor use accounts for nearly 8 billion gallons of water each day, mainly from landscape irrigation. You can learn more about water-smart residential yards from EPA WaterSense Outdoor Resources. Reducing lawn watering does not mean every plant in the backyard stops needing water. Trees, shrubs, flowers, and other living plants still need appropriate care. The benefit is narrower and easier to understand: the turf area itself no longer needs routine irrigation to stay green. That can reduce dependence on lawn watering and make the yard easier to manage. 4. Artificial Turf Makes the Backyard Easier to Use A backyard is more valuable when the family can actually use it. Artificial turf creates a consistent surface for everyday activities such as walking, playing, relaxing, and spending time outdoors. Instead of treating the lawn mainly as something that needs to be maintained, homeowners can use it as part of their outdoor living area. This is where the usability benefit becomes important. A residential yard may serve several purposes during the same week. Children may play on it. A dog may run across it. Family members may sit outside or walk through the area. Guests may use it during a gathering. Repeated foot traffic is part of normal backyard use. A suitable turf system gives homeowners a defined surface for these activities while keeping the lawn area visually consistent. The advantage is not simply that artificial turf looks good. It gives the residential yard a practical role in everyday life. 5. It Gives Children and Pets a More Usable Outdoor Space A consistent play area for children Children can use a backyard for running, playing, and other everyday outdoor activities. A consistent turf surface can make the lawn easier to use when children move across the area repeatedly. The appearance also stays more uniform than a natural lawn that develops worn or bare spots from frequent foot traffic. That does not mean every turf surface is suitable for every type of play. Product choice, installation quality, and the way the area will be used still matter. The important benefit is simple: artificial turf can give children a dedicated outdoor area that remains available for regular backyard activities. A practical surface for pets Pets can place heavy demands on a residential lawn. Dogs may run across the same areas, create muddy paws after wet weather, or dig into natural grass. Artificial turf can provide a more consistent surface for frequent pet traffic. It can also make cleanup easier because there is no living grass that becomes muddy in the same way after repeated use. Drainage is another important part of a pet-friendly turf system because liquid needs a path through the turf and underlying base. Artificial turf does not remove the need for cleaning or pet care. It simply changes the surface being maintained. For homeowners planning a dedicated pet area, see SD Home Turf’s artificial turf services for residential turf options that can

Installer smoothing turf edges in a backyard, a real look at how much does it cost to install artificial turf for a professional job
DIY vs Professional Installation

How Much Does It Cost to Install Artificial Turf?

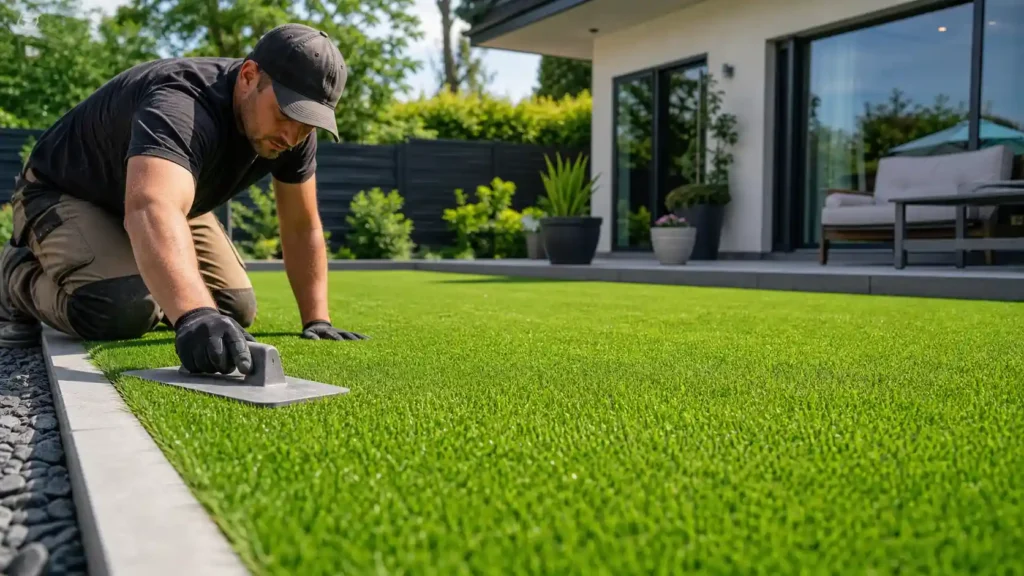
How much does it cost to install artificial turf? There is no single price that fits every yard. In 2026, published estimates range from about $3,200 to more than $8,700 for many residential projects, while Home Depot says its installation projects start around $5,000. A San Diego-area cost guide currently places standard professional installs around $9 to $13 per square foot. These figures are useful benchmarks, not fixed quotes. The final price depends on your square footage, existing lawn, excavation, base material, turf type, infill, edging, drainage, site access, seams, labor, and design. The important question is not only what turf costs. It is what work and materials are included in the complete installation. What Determines the Cost of Artificial Turf Installation? The same square footage can produce very different installation prices. A simple rectangular yard with easy access may need less preparation than a smaller yard with difficult access, poor soil, several seams, or drainage work. Think of the total artificial grass installation cost as several parts working together: Area and square footage Excavation and existing lawn removal Base material Turf type Infill Edging and edge restraint Drainage Site access Seams Labor Custom designs That is why a per-square-foot price should be treated as a starting point, not the whole quote. 1. Square Footage Square footage is the first number an installer needs. A larger area requires more artificial grass, base material, infill, and installation time. A smaller project may use less material, but it can still have a higher effective cost per square foot if the job involves complex cuts, tight access, or a small amount of turf spread across several sections. This is why artificial grass cost per square foot should not be viewed in isolation. For example, two 500-square-foot yards can have different prices. One may be a clean rectangle with open access. The other may have curves, stairs, existing grass, several seams, and extra preparation. Square footage sets the scale of the project. It does not define the entire price. 2. Excavation and Existing Lawn Removal What is already on the ground matters. If an existing lawn is present, the installer may need to remove grass and organic material before building the new surface. Excavation may also be needed to reach the correct finished height. The amount of work depends on: Existing grass and vegetation Soil conditions Required excavation depth Amount of material removed Disposal needs Finished elevation More excavation means more labor, equipment use, material handling, and possible disposal costs. For a deeper look at this part of the installation, see our guide on How to Prepare the Ground for Artificial Grass. 3. Base Material The base is one of the most important hidden parts of an artificial turf installation. A proper base provides a stable surface below the turf. Depending on the site, this can involve aggregate or other crushed base materials, grading, moisture control, and compaction. Current 2026 pricing published by Angi places common artificial grass sub-base materials around $1.20 to $2.25 per square foot. That is a material benchmark only. Excavation, delivery, compaction, access, and labor can change the actual base cost. Your soil and site conditions also matter. A base installed over unsuitable or poorly prepared ground may require more work than a straightforward site. For the technical side of this cost factor, read Do You Need a Sub-Base for Artificial Grass?. 4. Turf Type The turf itself is another major part of the material cost. Artificial grass is available in different fiber materials, construction styles, quality levels, and durability grades. Polyethylene, polypropylene, and nylon are common fiber materials, and their performance and price can differ. Current national data from Angi lists artificial grass materials at roughly $2 to $8 per square foot, depending on turf type and other product factors. A higher material price does not automatically mean the right choice for every yard. The turf should match the intended use, expected traffic, appearance, and required durability. The key distinction is simple: Turf cost is the cost of the product. Installed cost includes the work required to turn that product into a finished lawn. 5. Infill Infill is another material used during installation. The amount and type required can affect the total project cost. Common infill materials include silica sand, zeolite, crumb rubber, and coated sand. Angi’s current 2026 data lists infill at about $0.30 to $1.75 per pound, depending on the material. The amount needed varies by turf system and installation requirements. Infill is not priced only by the material itself. The installer must also distribute it across the turf and work it into the fibers. That means your quote can include both infill material and application labor. 6. Edging and Edge Restraint The perimeter of the installation also affects cost. Artificial turf needs to be secured around its edges so the finished surface stays in place. The exact method depends on the site and the perimeter condition. A large rectangular lawn may have a relatively simple perimeter. A yard with many corners, curves, transitions, or separate sections can require more edge work. The cost can include: Edge restraint Fasteners Perimeter preparation Securing the turf Extra cutting and fitting This is one reason two yards with the same square footage can have different installation prices. 7. Drainage Requirements Drainage should be considered before the turf is installed. A site with good drainage may need little additional drainage work. A yard with poor soil, low areas, standing water, or other drainage problems may require additional work before the turf can perform properly. That additional work can increase the project price. The goal is not simply to place synthetic grass over the ground. Water needs a path away from the surface and through the layers below it. For the full drainage topic, see How Does Artificial Turf Drain Water?. The EPA’s research on synthetic turf field construction also describes stone or gravel base layers as part of drainage-oriented turf systems. Residential installations vary, so the exact system should be

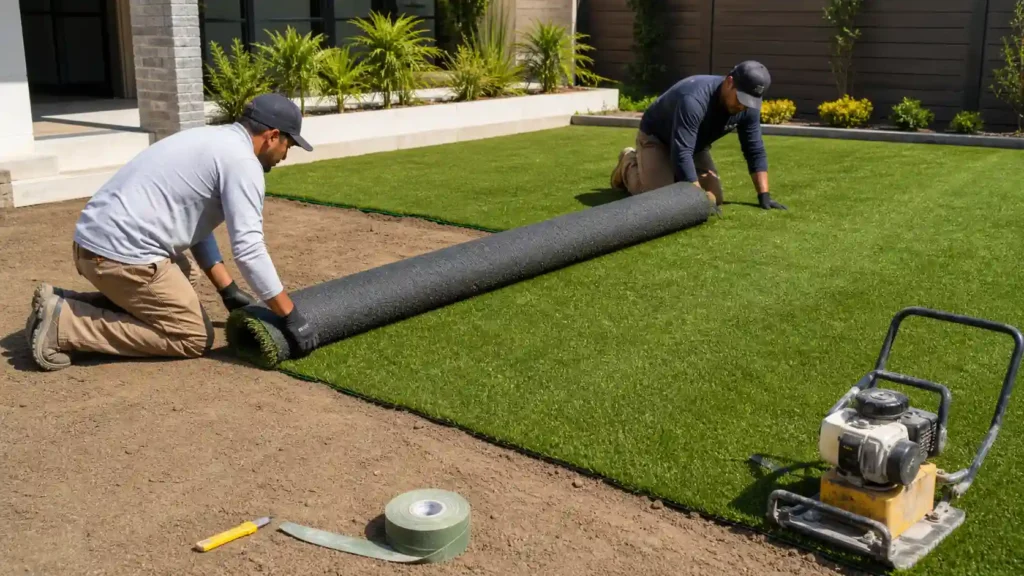
How to Choose the Right Artificial Turf Installer: two crew members rolling out artificial turf over a prepared soil base in a backyard.
DIY vs Professional Installation

How to Choose the Right Artificial Turf Installer

Choosing an artificial turf installer is about more than finding a low quote. The right contractor should show proven experience, explain the installation plan, prepare a stable base, solve drainage issues, use quality materials, and stand behind the finished work. Before you sign an agreement, compare each installer on the same core points. Look at their credentials, past projects, seams, written estimate, materials, and warranty. This makes it much easier to spot the difference between a skilled installation crew and a company that mainly sells turf. This guide walks through the 11 things that actually separate a solid job from a costly mistake. 1. Look for Proven Artificial Turf Installation Experience Start with the installer’s actual experience, not just the number of years listed on a website. Ask how long the company has performed artificial grass installation and how many similar projects it has completed. Experience with a small residential lawn is useful, but a large yard, sloped property, commercial area, or complex drainage site may require different skills. Ask to see completed projects that are close to yours in size and site conditions. A good artificial turf installer should be able to explain why a certain base, drainage plan, turf product, or installation method was used. You should also learn who will perform the work. A salesperson may know the products well, while the installation crew handles the actual site work. Ask about the crew’s practical experience with excavation, subgrade work, compaction, grading, seams, edge restraint, and infill. Strong evidence of experience includes: A consistent project portfolio Completed residential and commercial projects References from similar jobs Clear knowledge of site conditions Specific answers about installation decisions Photos showing finished workmanship The goal is not to hire the company with the biggest number. It is to find a synthetic turf contractor who can show relevant work and explain the decisions behind it. 2. Verify Licensing and Insurance Before Hiring Do not rely on a website statement that says a contractor is “licensed and insured.” Verify it. For a California project, the Contractors State License Board provides a public license search where homeowners can check a contractor’s license status and other available information. You should also ask for proof of general liability insurance and workers’ compensation insurance. The CSLB advises consumers to request a Certificate of Insurance or verify coverage with the contractor’s insurance carrier. California employers generally must carry workers’ compensation insurance for employees, subject to the rules and exemptions that apply to their situation. Check that the documents belong to the same company that will perform your project. Also ask about any certification the installer claims to hold. Certified synthetic turf contractors can be useful when the certification is relevant and verifiable. Do not treat a badge or logo alone as proof of installation skill. 3. Ask the Installer to Explain the Installation Process A professional should be able to explain the full artificial turf installation process for your property. The plan should address the site assessment, removal of existing material, excavation, subgrade preparation, base installation, compaction, grading, drainage planning, turf placement, cutting, seaming, edge securing, infill, and final inspection. The important part is not hearing a long list of steps. It is hearing a plan that fits your property. For example, a good installer should be able to explain what happens if the existing soil is soft, where rainwater currently flows, how the finished grade will be set, and how the turf will be secured around the edges. A vague answer such as “we prepare the ground and install the turf” does not tell you enough. For a deeper look at the full process, see our guide on how artificial grass is installed. 4. Examine How the Installer Prepares the Base The base is hidden after installation, but it has a major effect on the finished surface. Ask: “What base system will you use for my property, and how will you prepare and compact it?” A proper plan should consider the existing soil or subgrade, excavation depth, base material, base thickness, layering, compaction, and final surface preparation. Common materials may include aggregate, crushed rock, Class II road base, or decomposed granite, depending on the site and installation design. The correct choice depends on soil conditions, drainage needs, use, and local installation requirements. Do not accept a quote that simply says “base included.” Ask what material will be used and how it will be compacted. Poor soil stability or weak compaction can affect the finished surface. A detailed installer should be able to explain the proposed base rather than treating every yard the same. Our guide on sub-base for artificial grass explains this part of the installation in more detail. 5. Evaluate the Installer’s Drainage Plan Drainage deserves a direct conversation before work begins. Ask where water currently goes and what will happen after the artificial turf is installed. The installer should consider existing drainage conditions, site grading, water flow, low spots, soil drainage, the aggregate base, and the turf backing. A permeable backing can allow water to pass through the turf, but the whole installation still needs a suitable path for that water. For example, if a yard already has poor-draining soil or a low area, simply laying turf over it does not solve the underlying problem. The installer should explain how the finished grade and base will help move water away from the surface. Ask a simple question: “Where will the water go after it passes through the turf?” A clear answer is more useful than a promise that the turf “drains well.” Read our guide on how artificial turf drains water for more detail on this part of the installation. 6. Compare Turf Products and Material Quality Do not choose an installer based only on the turf’s color or price. Ask which turf manufacturer and product they recommend. Then ask why that product fits your property. A useful product discussion may include turf fibers, yarn construction, blade shape, backing, UV resistance, drainage characteristics, intended application,

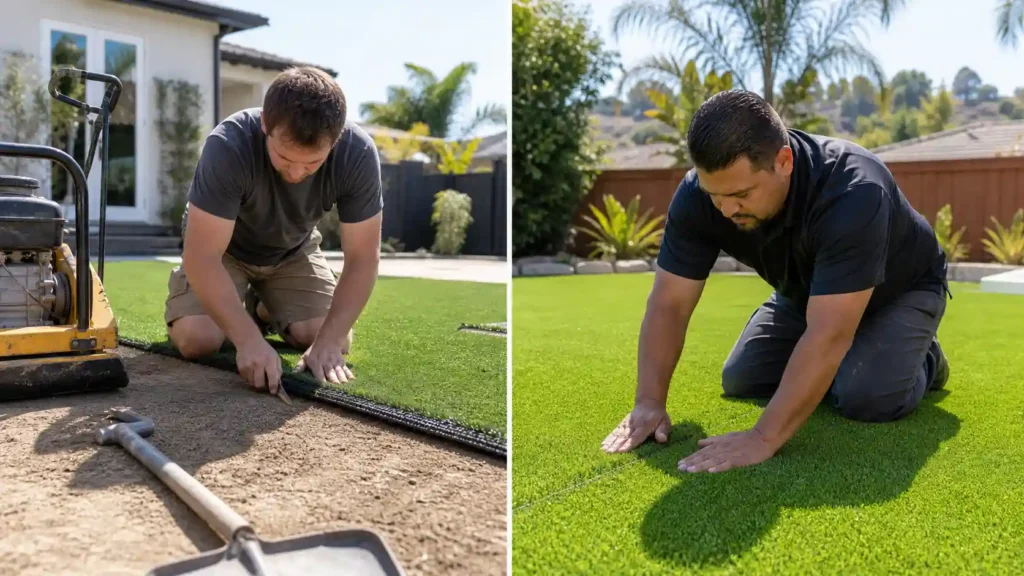
Split-screen photo comparing DIY and professional work, showing can you install artificial grass yourself with real backyard examples.
DIY vs Professional Installation

Can You Install Artificial Grass Yourself or Should You Hire a Professional?

Yes, you can install artificial grass yourself, but not every yard is a good DIY project. A small, simple lawn can be manageable if you have the tools, time, and strength for excavation, base work, cutting, and securing the turf. The real choice comes down to more than rolling out grass. Project size, site condition, drainage, seams, edge restraint, tool access, and the quality of the finished work all matter. A professional becomes more useful as those demands increase. This guide breaks down exactly where DIY gets hard, and where it pays to call in help. Can You Install Artificial Grass Yourself? Quick Answer DIY artificial grass sounds simple. Roll it out, cut it to fit, done. That is not how it actually works. The turf itself is the easy part to handle. The real work happens before you ever touch the roll. Ground prep, base compaction, drainage, and seams are what separate a lawn that lasts fifteen years from one that fails in twelve months. DIY synthetic grass installation is realistic when your project is small, your site is flat, and you are ready for real physical labor. For most residential lawn installation projects, site conditions matter more than skill level. You need basic tools, patience for precise cutting, and a willingness to get the base right before the turf goes down. Professional installation makes more sense as the yard gets bigger, the drainage gets trickier, or the layout gets more complicated. Complexity adds up fast on an installation project, and mistakes made early are hard to fix once the turf is already down. How Difficult Is DIY Artificial Turf Installation, Task by Task? DIY artificial turf installation involves three kinds of work: physical labor, precise detail work, and problem solving when the site is not perfectly flat or square. Here is where each task actually gets hard, and why a simple-looking step can turn into a technical one. Excavation Digging out the old lawn looks straightforward. In practice, you are removing soil, roots, and debris across the whole area, often three to four inches deep. The work becomes physically demanding fast, especially in clay soil or a sloped yard. Get the depth wrong and your finished turf sits too high or too low against patios and walkways. For the full process, see how to prepare the ground for artificial grass. Base Compaction Spreading base material looks simple. Compacting it correctly is not. You need even layers of aggregate, packed down with a plate compactor, not just a rake and your body weight. Skip a pass or rush the compaction, and the ground settles unevenly months later, leaving dips and low spots under your turf. Learn more in the sub-base for artificial grass. Turf Cutting Cutting turf looks easy with a utility knife and a straight edge. Inaccurate cuts waste expensive material and leave gaps at the edges. You have to measure twice, account for the direction the blades lay, and cut from the backing side, not through the face. One bad cut can mean ordering more turf. Seams Joining two pieces of turf looks easy from a distance. Poor seams remain visible up close, especially where the blade direction does not line up or the seam tape does not bond evenly across the full length. This detailed work is what separates a lawn that looks real from one that looks patched together. Fixing a bad seam after infill is down is much harder than getting it right the first time. Drainage Creating drainage looks simple: just tilt the ground downhill a little. Poor drainage planning causes standing water, odor, and a soggy base that can break down over time. You need the right slope, the right base material, and sometimes drainage holes cut into the backing itself. Read how artificial turf drains water to understand what the base actually has to do. Edge Restraint Securing the edges looks like a small, final step. Inadequate restraint lets the turf shift, lift, or pull away from borders after a season of foot traffic and weather. Bender boards, spikes, or nails need to go in at the correct spacing, not just loosely around the visible perimeter. If you have read through these six tasks and feel confident you can handle them, our complete artificial grass installation guide walks through the full process from start to finish. What Tools Do You Need for DIY Artificial Grass Installation? Tool access can change whether DIY makes financial sense. Ground preparation tools Typical ground preparation may require: Shovel Rake Wheelbarrow Plate compactor Hand tools for removing and shaping soil Turf installation tools You may also need: Utility knife Measuring tape Straight edge Chalk line or marking tool Seam tape Seam adhesive Fasteners or landscape nails Tools for securing the turf edges A Forbes Home artificial grass installation guide also lists common DIY equipment such as a shovel, rake, wheelbarrow, tape measure, carpet cutter, hand tamper, and other installation tools. Why tool availability matters Owning basic hand tools is not the same as having everything required for a larger project. You may need to rent a plate compactor or other equipment. You also need space to move and store materials during the job. That creates a simple test: If you already have suitable tools and can rent the remaining equipment at a reasonable cost, DIY may make sense. If getting the equipment becomes expensive or difficult, professional installation becomes more attractive. How Much Labor Does DIY Artificial Grass Installation Require? Labor goes up with square footage, excavation depth, the amount of base material you’re moving, and how many turf pieces you need to sew together. A small side yard might take one weekend. A full backyard with tricky access can take several days of hard, physical work. Installation time depends heavily on how much prep the site needs before the turf ever goes down. DIY saves you the cost of professional labor. It does not remove the labor itself. It just moves that work onto

How to Fix Drainage Problems Under Artificial Turf: standing water pooling on green synthetic grass beside a backyard patio edge.
Artificial Turf Drainage & Underlay

How to Fix Drainage Problems Under Artificial Turf

Water sitting on your lawn after rain is not normal, even with artificial turf. If you want to know how to fix drainage problems under artificial turf, the short answer is this: find the exact point where water stops moving, then fix that point. The cause is usually a blocked drainage hole, compacted soil, a weak sub-base, a low spot, poor slope, or pet urine buildup. Don’t guess and add a fix at random. A French drain will not help if the real problem is compacted soil three inches down. Find the failure point first, then apply the right repair. How to Tell If Your Artificial Turf Has a Drainage Problem Some drainage issues are easy to spot. Others only appear after a heavy rain. Look for these signs: Standing water that sits for more than 20 to 30 minutes after rain Slow drainage, where water moves but takes too long to disappear Puddles that show up in the same spot every time it rains Water collecting near a patio, wall, or other hard surface Soft or spongy areas when you walk across the lawn Water pooling near a pet’s favorite bathroom spot The location matters. A puddle in one low spot points to a different problem than water staying across the entire yard. If water disappears quickly from most of the turf but remains in one area, start with that area. The problem may be a low spot, poor grade, or a localized base issue. How Artificial Turf Is Supposed to Drain Water Before you fix anything, it helps to know the normal path water should take. Water moves through five layers, in this order: Turf surface → perforated backing → infill → sub-base → native soil (or a drainage outlet) Each layer has one job. The backing has drainage holes punched through it. The infill sits between the grass fibers and lets water pass instead of blocking it. The sub-base is a compacted layer of aggregate that holds the turf’s shape and lets water keep moving down. Below that is your native soil, which either absorbs water or lets it run off. A drainage problem means one of these layers stopped doing its job. Some of these issues start at the original build. If your turf was installed with the wrong slope or a shallow sub-base, drainage problems can show up months or years later. Reviewing a complete artificial grass installation process is a good way to check if your original build skipped a step that matters now. For a quick explanation of the normal water path, see our guide on how artificial turf drains water. It helps explain the system before you troubleshoot a failure. How to Fix Common Artificial Turf Drainage Problems Here is where we get specific. Each cause below needs a different fix. Don’t apply all of them at once. Match the fix to the actual problem you found. Fix Standing Water and Recurring Puddles First, figure out if the water sits in one exact spot or spreads across the whole lawn. One spot usually means a low area or a dip in the base. A spread-out problem usually points to a bigger issue below the surface. Check where the water is coming from. Is it just rain landing on the turf, or is water running in from a neighboring yard, patio, or downspout? You can’t fix turf drainage if the real source is water flowing in from somewhere else. Next, check if the turf itself drains but the ground underneath does not. Pour a bucket of water on the spot. If it disappears fast through the turf but reappears minutes later, the turf is fine and the ground below is the problem. In that case, don’t disturb the surface. The fix has to happen at the sub-base or soil level, which we cover next. Typical cost: Fixing one small low spot by lifting the turf and adding aggregate usually runs $150 to $400 for a standard residential yard, depending on size and access. Clear Blocked Drainage Holes and Backing Turf backing has small holes designed to let water pass through. Over time, dirt, dust, and fine sediment settle into these holes and slow the flow. To check this, peel back a small section of turf and look at the backing. If the holes look packed with debris, that’s your answer. Clear the visible debris by hand or with a soft brush. Avoid a high-pressure washer directly on the backing. Too much pressure can push debris deeper into the holes instead of clearing them, and it can loosen the seams. If clearing the surface debris does not restore normal water flow, the blockage is likely deeper in the infill layer, not just the backing holes. Typical cost: A professional deep clean and hole clearing service runs $200 to $450 for an average backyard. Correct Compacted Soil Under Artificial Turf This is one of the most overlooked causes, and it’s a big one. There’s a difference between turf that drains into the base and water that actually leaves the soil underneath. If your native soil is dense clay or has been compacted by years of foot traffic, water can pass through the turf and the base just fine, then get stuck right below. You’ll notice this as a soft, waterlogged feel that lasts for hours or days after rain, even though the surface looks dry. Sticking a screwdriver into the ground near the wet area is a quick test. If it’s hard to push in even a few inches, the soil is compacted. The fix means lifting the turf in that section, breaking up the compacted soil, and improving drainage before putting the base back. This is exactly why ground prep matters before turf ever goes down. If you’re rebuilding a section, our guide on how to prepare the ground for artificial grass walks through the grading and soil steps that prevent this from happening again. In some cases, this problem traces back to

Does Artificial Grass Need an Underlay? Cutaway diagram showing soil, gravel base, foam underlay, and turf layers in a proper installation.
Artificial Turf Drainage & Underlay

Does Artificial Grass Need an Underlay? Full Guide

No, artificial grass does not always need an underlay. A typical residential lawn installed over a properly prepared surface can perform well without foam beneath the turf. An underlay becomes useful when you want extra cushioning, a softer feel, or added impact protection. The right choice depends on the surface and how you plan to use the area. Concrete, playgrounds, putting greens, and normal residential lawns can each call for a different approach. What Is Artificial Grass Underlay? (Foam Underlay vs. Underfelt) Underlay is a thin layer placed between the base and the turf itself. Most installers call it foam underlay. Some homeowners search for it as undervalued for artificial grass, borrowing the term from carpet fitting. It’s the same idea, but built for outdoor use. Foam underlay is usually made from closed-cell foam, often XPE. It has small holes punched through it so water can pass right through instead of pooling. That matters because a solid foam pad with no drainage holes will trap moisture and cause smells over time. Don’t confuse underlay with a sub-base. A sub-base is a layer of compacted aggregate, like crushed rock or decomposed granite, that sits below the turf and gives it structure. Underlay is optional and sits on top of that structure. They solve different problems. When Does Artificial Grass Need an Underlay? Most artificial grass does not automatically require an underlay. The key question is what you need the extra layer to do. There is a useful difference between something being required, useful, or unnecessary. For a normal residential lawn, an underlay is often optional. The turf can be installed without foam when the surface is suitable and the goal is a standard lawn. An underlay becomes more useful when the surface is hard or when extra cushioning is wanted. Concrete is one common example. A foam layer can make a hard surface feel softer beneath the artificial turf. Playgrounds are different again. If children can fall from play equipment, the surface may need tested impact attenuation. In that case, the discussion moves from simple comfort to a suitable shock pad and the required fall-height performance. Putting greens also has different needs. A soft foam layer is not automatically better for a putting surface because firmness, consistency, and ball roll matter. So the question is not simply whether artificial grass needs an underlay. The better question is whether an underlay solves a real need for that particular surface and use. When Is an Underlay Not Necessary? For a normal residential lawn, you usually don’t need foam underlay. If the ground has been excavated, graded, and compacted the right way, that base alone gives the turf a stable, even surface to sit on. This is why proper prep work matters more than any add-on layer. If you want to see exactly how that process works step by step, our artificial grass installation process guide walks through it from start to finish. An underlay does not replace good ground work. If the soil underneath is soft or uneven, no amount of foam will fix that long term. You need to prepare the ground for artificial grass properly first. And if you’re wondering whether your yard even needs a stone base before the turf goes down, we cover that in our guide on whether you need a sub-base for artificial grass. Skip the underlay on a standard backyard lawn. Save that money for better turf or proper base material instead. When Is Foam Underlay Useful? There are a few situations where foam underlay earns its cost. Softness. If you want your lawn to feel extra springy underfoot, a foam layer adds that bounce. Artificial grass is already fairly soft on its own, but underlay takes it a step further. Hard surfaces. Laying turf straight onto concrete or a patio slab feels firm and unforgiving. A layer of cushioning softens that feel and can hide small dips or rough spots in the surface below. Fall protection. If kids play in the space, or if anyone in the household is unsteady on their feet, extra cushioning lowers the chance of injury from a trip or fall. Outside of these three cases, most homeowners are happy without it. Foam Underlay vs Shock Pad: What’s the Difference? The two terms are related, but they should not be treated as the same product. Foam underlay is mainly used for cushioning and comfort. It can give artificial turf a softer feel and can be useful over hard surfaces. The shock pad is designed around impact attenuation. It is used when the surface needs to reduce the force of an impact from a fall. That difference matters most in playground applications. For example, a homeowner may want foam underlay under a lawn because they prefer a softer feel. A playground with elevated play equipment has a different problem. The surface must be assessed for fall impact, not just how soft it feels. ASTM F1292 addresses impact attenuation for playground surfacing and uses measures such as Gmax, Head Injury Criterion (HIC), and critical fall height to evaluate performance. The CPSC also identifies ASTM playground-surfacing standards as relevant voluntary standards for playground surfaces. So, do not choose a shock pad based only on thickness or softness. The pad needs to suit the intended application and required impact performance. Do You Need Underlay for Artificial Grass on Concrete? This is one of the most common questions we get, and the answer is different from a soil-based lawn. Do you need underlay for artificial grass on concrete? It’s not required, but it’s usually worth it. Concrete is a hard, unforgiving surface. Without a cushioning layer, the turf will feel stiff and every small crack or bump in the slab can show through. A foam layer helps in two ways. It softens the feel underfoot, and it smooths out small surface imperfections so they don’t telegraph through the grass. It won’t fix major cracks or pooling water on its own. If your concrete has drainage

Cross-section showing how does artificial turf drain water through the backing, base and soil, with arrows tracking water flow
Artificial Turf Drainage & Underlay

How Does Artificial Turf Drain Water? Full Guide

How does artificial turf drain water? It moves down through small holes in the turf backing, into a layer of crushed rock underneath, and then into the soil below it. Artificial turf does not soak up water the way real grass does. This system works well in most yards. But it only works as well as the base, the slope, and the soil under it. We will walk through each part below. How Water Moves Through Artificial Turf Artificial turf is built to let water move through it rather than hold water on the surface. The drainage process has three main stages: the turf backing, the base and the soil. Understanding these stages makes it easier to see why some artificial lawns drain well while others develop standing water. Water Passes Through the Turf Backing Turf fibers are plastic. They don’t need to absorb water the way a natural grass blade does. Water simply moves down and around the fibers toward the backing underneath. Most artificial turf drainage systems use one of two backing types. A perforated backing has small drilled holes spaced evenly across the surface. A fully permeable backing lets water pass through the entire material, not just through holes. Both types are built to move water fast. The Synthetic Turf Council’s own performance guidelines call for a water permeability rate above 10 inches per hour after installation, based on ASTM F1551 testing. That is far more water than a normal storm will ever drop on your yard at once. Water Moves Into the Base Once water clears the backing, it reaches the base underneath. This layer is usually made of crushed rock, decomposed granite, or another aggregate material. A good base is compacted enough to hold the turf’s shape, but it still has small gaps between the rock particles. Those gaps are what let water keep moving down instead of pooling right under the turf. This is also why the sub-base for artificial grass matters so much. A base that’s too fine, too thin, or packed too tight will slow water down no matter how good the turf on top is. Water Continues Into the Soil This is the part most people never think about, and it’s where real drainage problems usually start. Water doesn’t stop at the base. It has to keep moving into the soil underneath the whole system. If the soil accepts water well, like sandy or loose soil, water keeps draining down and away. If the soil is poor-draining, like heavy clay, water moves much slower. Clay soils can have an infiltration rate below one tenth of an inch per hour, compared to several inches per hour for sandy soil, according to USDA soil infiltration data. When that happens, water can sit and saturate the ground under your base, even if the turf and base did their job correctly. This is why proper grading matters before installation, not after. Our guide on how to prepare the ground for artificial grass covers how we check and adjust for soil conditions before any turf goes down. Does Artificial Turf Drain Well Compared to Regular Grass? Artificial turf and natural grass handle water in different ways. Natural grass depends heavily on the soil beneath it. Rain reaches the grass and then moves into the soil. How quickly that happens depends on the soil type, its condition and how much water it can accept. Artificial turf creates a more defined drainage pathway. Water can move through the turf backing and into the prepared base before reaching the soil. That gives artificial turf a key advantage in the turf layer itself. The surface does not depend on grass roots or soil at the surface to absorb water. But that does not mean artificial turf is independent of the ground below it. The soil still matters. A yard with permeable soil may allow water to move away quickly. A yard with poor-draining soil may hold water beneath the turf for longer. So, is artificial turf drainage comparable to a regular lawn? It can be very effective, but the two systems should not be judged in exactly the same way. Natural grass relies more directly on soil infiltration. Artificial turf uses a designed pathway through the backing and base before water reaches the soil. The complete drainage system is what determines the result. What Happens When It Rains or You Irrigate Artificial Turf? Rainwater follows the same basic drainage path. Rain lands on the turf surface, moves between the turf fibers and travels downward through the permeable backing and drainage holes. It then enters the base and continues toward the soil or another intended drainage path. Light rain may move through the system quickly. Heavy rainfall can place much more water on the area in a short period. Irrigation works in much the same way. When you water an artificial lawn, the water does not need to be absorbed by the turf blades. It moves through the surface and follows the drainage pathway underneath. This is why a properly installed artificial lawn should not behave like a waterproof sheet during normal rain or irrigation. If water remains on the surface after normal watering, the important question is what is stopping that water from moving away. The issue may involve the slope, the drainage pathway, the base or the soil below it. How Slopes Affect Artificial Turf Drainage Slope helps control where water goes across the surface. The backing and drainage holes help water move through the turf. The slope helps water move across the site toward its intended direction. These are different jobs. Think of the drainage process this way: Backing: let water move through the turf. Drainage holes: provide openings for downward flow. Base: provides a path beneath the turf. Slope: helps direct surface water. Soil: receives water after it moves through the system. A properly graded area gives water a direction to follow instead of allowing it to collect in a low spot. This matters most where

Backyard prep showing removed grass sod, gravel base, and new turf, answering can you install artificial grass over existing grass correctly.
Artificial Turf Installation

Can You Install Artificial Grass Over Existing Grass?

No, not for a proper permanent installation. You should remove the existing grass, roots, and organic material before installing artificial turf over soil. Leaving the old lawn underneath can lead to settlement, soft spots, weeds, and drainage problems later. It may look like skipping grass removal will save time and money. In practice, it leaves an unstable layer underneath the turf. A good artificial lawn needs prepared soil and a compacted sub-base, not living or decomposing grass beneath it. Can You Put Artificial Grass Directly Over Existing Grass? You can physically lay artificial grass over a lawn, but that does not make it a sound permanent installation. Natural grass is more than a green surface. Beneath it are roots, thatch, organic material, and soil that can change over time. Artificial turf does not stop those materials from breaking down or the ground from moving. For a permanent artificial grass installation over soil, the existing lawn should be removed first. The exposed soil can then be checked, graded, prepared for drainage, and compacted before the sub-base is installed. This is the key difference between what you can physically do and what should be done for a lasting installation. When homeowners ask, “can you put artificial grass on grass,” the practical answer is no for a permanent lawn. The turf needs a firm, prepared surface below it. A proper system is built in layers: Prepared soil → compacted sub-base → artificial turf → infill Existing grass does not belong in that structural system. Why Should You Remove Grass Before Installing Artificial Turf? The main issue is not the grass blades you can see. The bigger concern is what remains underneath them. Existing Grass Can Decompose and Cause Settlement Grass, roots, thatch, and other organic matter do not remain unchanged under an artificial lawn. Once the old lawn is covered, the organic material can break down. As it loses volume, the ground above it can settle. That may create soft spots, small voids, or low spots beneath the turf. The problem often develops slowly. At first, the new artificial lawn may look fine. Months later, you may notice a low area or a softer section underfoot. The turf did not cause the settlement. The material underneath it changed. That is why laying artificial turf on existing lawn is a poor choice for a permanent installation. The basic chain is simple: Grass and roots → decomposition → loss of volume → settlement → soft spots or low spots Removing the organic layer gives the installer a much better surface to inspect and prepare. Existing Grass Can Create an Uneven Surface Artificial turf follows the shape of the surface below it. It does not level an unstable subgrade. If the existing lawn has bumps, old roots, uneven soil, or areas that already settle, those conditions can remain below the turf. After installation, movement in the soil can show up as an uneven finished surface. This is why proper artificial grass installation over grass starts with removal rather than covering. Once the grass is gone, the subgrade can be inspected. Low areas can be addressed, the grade can be corrected, and the soil can be compacted where needed. A stable surface also reduces the chance of turf movement, wrinkles, and visible low spots. The goal is not simply to make the soil look flat. The goal is to create a firm surface that can support the complete turf system. Roots and Weeds Can Create Problems Removing the visible grass is not enough if a thick layer of roots and organic material remains. Roots can leave loose material in the soil. Existing weeds can also continue to create problems if they are not dealt with before installation. This matters around turf seams, edges, and small openings where vegetation may find a path upward. A weed barrier can help reduce weed growth, but it should not be treated as a replacement for removing the existing lawn. The better sequence is to remove the sod, roots, weeds, and loose organic material first. Then prepare the soil and use a suitable permeable weed barrier when the installation calls for one. Existing Grass Can Interfere With Drainage Artificial turf can allow water to pass through its backing, but that does not mean the ground underneath will drain properly. Drainage starts below the turf. The soil needs the correct grade, and the prepared base needs enough stability and permeability for water to move through the system. If the old lawn covers soil that already holds water, simply laying turf over it does not solve the problem. You may end up covering the symptoms instead of fixing the cause. A proper preparation sequence is: Remove vegetation → inspect soil → establish grade → address drainage → compact the subgrade → install the sub-base This gives the finished artificial lawn a better chance of handling normal rainfall without standing water or puddles. What Happens If You Install Artificial Grass Over Existing Grass? The problems are not always visible on installation day. Here is what can happen when the existing lawn is left underneath: Grass decomposes. Organic material can break down beneath the turf. The surface can settle. As the underlying material changes, the finished surface may sink. Low spots may form. Areas that settle more than others can create depressions. The turf can become uneven. Artificial grass follows movement below it. Water may collect. Poor grade or weak soil can contribute to standing water and puddles. Weeds may appear. Remaining vegetation can create growth problems around gaps and edges. Repairs become harder. Once the turf, seams, and perimeter are installed, correcting the ground underneath means disturbing finished work. These are the main artificial grass over grass problems to consider before choosing the shortcut. A turf surface can only be as stable as the foundation below it. This is also why poor preparation is one of the common causes of artificial turf failure. Ground movement, weak base preparation, and drainage issues can all show

Backyard showing how to prepare the ground for artificial grass, with excavated soil, a shovel, and a wheelbarrow beside finished green turf.
Artificial Turf Installation

How to Prepare the Ground for Artificial Grass

Proper artificial grass preparation starts with the ground, not the turf. You need to remove vegetation and organic material, establish the correct elevation and drainage, prepare a stable sub-base, compact it properly, install the right barrier, and make sure the perimeter is ready before laying the turf. If you are learning how to prepare the ground for artificial grass, do not treat the job as simple leveling. The goal is to create a firm, well-drained, correctly graded surface that can support the entire turf system without soft spots, settling, or drainage problems. What Does Ground Preparation for Artificial Grass Involve? Good turf preparation follows a clear order: Remove the old grass and debris. Excavate to the right depth. Grade the soil. Solve any drainage issues. Build the sub-base. Compact it. Add a weed barrier where it makes sense. Prepare the perimeter. Then check that everything is ready. Each stage affects the next one. Removing roots but leaving poor drainage can still cause problems. Building a good sub-base over unstable soil can also lead to movement later. The prepared subgrade is the soil surface below the sub-base. It needs to be clean, stable, correctly graded, and ready to support the base material. Do You Have to Dig Up the Dirt Before Installing Artificial Grass? For a permanent installation over soil, you generally need to excavate rather than simply laying turf on top of existing dirt. Excavation does several jobs: Removes existing vegetation and roots Removes organic material that can decay Creates space for the sub-base Helps establish the correct finished elevation Allows proper grading Creates a stable foundation for the turf system The excavation depth is not one universal number for every yard. Existing grade, soil condition, drainage, surrounding hardscape, and the required turf system all affect the amount of soil that needs to be removed. The key is to reach the planned finished grade while leaving enough room for the complete base system. Before digging, check for underground utilities. In the United States, 811 is the nationwide “Call Before You Dig” resource for having buried utilities marked before excavation. How to Prepare the Ground for Artificial Grass 1. Remove Existing Grass, Weeds and Organic Material Start with a clean area. Remove existing sod, grass, weeds, roots, mulch, organic debris, and large rocks. A shovel or sod cutter can work for smaller residential areas. Larger projects may need mechanical equipment. Do not leave a thin layer of grass or roots because it looks harmless. Organic material can break down after installation and leave voids beneath the system. Those voids can contribute to uneven areas and settlement. The goal is to expose clean native soil that can be inspected and prepared. Look across the entire area after removal. Check for: Remaining roots Buried organic matter Large rocks Loose soil Soft areas Old landscape material Low spots This is also the point to remove anything that could interfere with the planned excavation and grade. 2. Excavate the Area to the Required Level Once the vegetation is gone, excavate the site to the required finished elevation. This is more than digging to a fixed number. You need to consider the existing grade and the height of the finished turf system compared with nearby surfaces. For example, a turf area next to a concrete walkway needs a planned transition. If you remove too little soil, the finished surface may sit too high. If you remove too much, you create unnecessary work and material requirements. During excavation, keep the subgrade reasonably consistent. Remove loose or unsuitable material instead of simply covering it with more aggregate. The final excavation should provide enough room for the planned sub-base while keeping the finished surface at the correct elevation. 3. Grade the Ground Before Adding the Base A common mistake is assuming that artificial turf requires a perfectly flat yard. It does not. The important goal is a properly graded surface that controls where water goes. Check for: High spots Low spots Existing slope Runoff paths Uneven transitions Areas that collect water A level surface and a properly graded surface are not always the same thing. A yard can look flat while still having poor water flow. Your finished grade should support the drainage plan and work with the surrounding property. The exact slope depends on the site. Do not force the same grade onto every yard. Existing structures, property drainage, hardscape, and local conditions all matter. 4. Address Drainage Problems Before Installing the Sub-Base Drainage needs to be checked before you cover the soil with aggregate. Look for standing water, saturated soil, water flowing toward the turf area, downspout discharge, low spots, dense clay, and unstable soil. If water already collects in the proposed turf area, simply adding a thicker base does not automatically solve the problem. Do not use the sub-base to hide a drainage problem. Dense clay can slow water movement. A hardpan layer can also restrict drainage below the surface. Saturated or unstable soil may need additional preparation before the base is installed. Depending on the site, the solution may involve correcting the slope, improving the drainage path, or adding a suitable drainage system. The important point is to solve the water problem before continuing with the base. A properly prepared surface should have a clear path for surface runoff rather than relying on chance. 5. Prepare and Install the Sub-Base After the subgrade is excavated, graded, and ready, the sub-base provides the stable working surface above the native soil. The sub-base helps create a firm foundation and supports drainage through the turf system. Common base material choices include: Crushed rock Class II road base Decomposed granite Other suitable aggregate specified for the installation The right material depends on the project. Soil condition, drainage, traffic, and the desired finished surface all matter. This article does not need to repeat a full comparison of base materials. For a deeper discussion of material selection, see The Best Base for Artificial Grass. Spread the aggregate evenly across the

Translate »
Seraphinite AcceleratorOptimized by Seraphinite Accelerator
Turns on site high speed to be attractive for people and search engines.