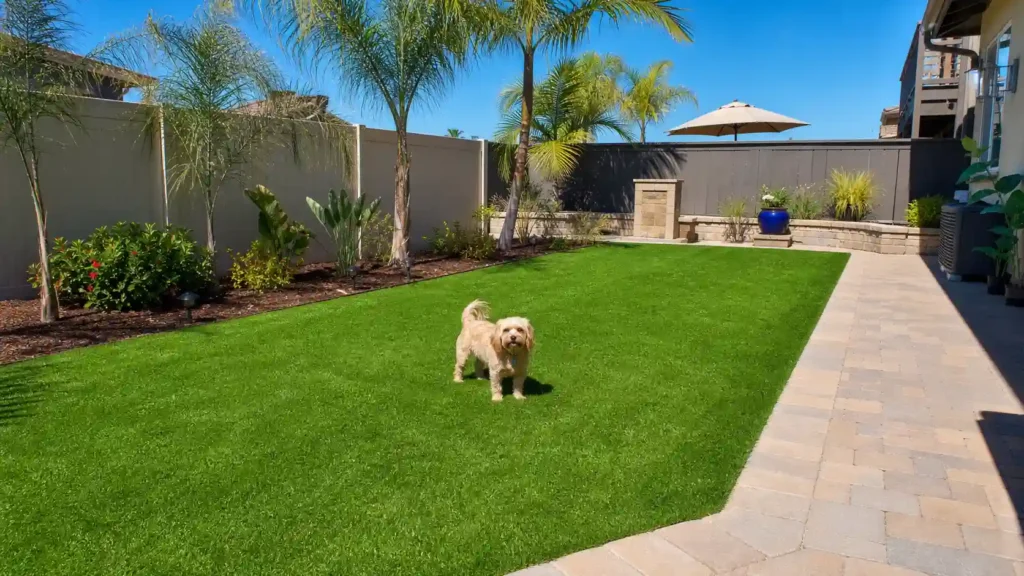
Yes, you can learn how to install artificial grass yourself. But the real work happens before you ever unroll the turf. Most installation failures start with skipped ground prep, not bad turf. This guide walks you through the full process, the way we do it in real San Diego yards.
We cover every stage of artificial turf installation, from site inspection to final check. You’ll also learn what changes the process and how to tell if your finished lawn was done right.
How Artificial Grass Installation Works
Before we break down each step, here’s the full sequence. This is what a proper artificial grass installation actually involves, start to finish:
- Plan and measure the area
- Inspect the site
- Remove existing grass
- Excavate the ground
- Prepare and compact the soil
- Install the sub-base
- Set the grade for drainage
- Install a weed barrier where needed
- Position the turf
- Cut and fit the turf
- Join the seams
- Secure the edges
- Apply infill
- Brush and inspect the finished lawn
Skip any one of these steps and you’re not really installing artificial turf. You’re just covering dirt with carpet. Let’s go through each stage.
What You Need Before Installing Artificial Grass
Tools
You’ll need a shovel, a rake, a wheelbarrow, and a tape measure for the early stages. A utility knife handles cutting. A hand tamper or plate compactor packs down your base material. A screed helps level the base. A stiff push broom finishes the job by standing the grass fibers up. Wear gloves and eye protection while you work.
Materials
Your material list includes the artificial grass itself, sub-base aggregate, a weed barrier, seam tape, adhesive, turf nails or staples, edge restraint, and infill. Each one plays a specific role. The aggregate holds the shape and drainage of your base. The weed barrier stops growth from below. The infill weighs the turf down and keeps the blades standing up. If you skip one, you’re not skipping a small detail. You’re skipping a system.
Plan the Artificial Grass Installation
This is the stage most guides rush through, and it’s where good installations actually start.
Measure the Installation Area
Measure the full square footage of your yard, including any curves or odd corners. Artificial grass comes in rolls, usually 12 or 15 feet wide, so irregular shapes create more waste. Order extra material, around 10%, to cover cuts and mistakes.
Plan Turf Roll Direction
Every roll of turf has a grain, like carpet. The fibers all lean one way. Lay out your rolls so the grain runs in the same direction across the whole yard. If you mix directions, the color will look different in the sun from different angles, even though it’s the same grass.
Plan Seams and Cuts Before Installation
Walk your yard and mark where seams will fall, where trees or posts sit, and where curves or borders will need trimming. Planning this on paper first saves you from cutting into good material later.
Inspect the Site Before You Dig
This step is what separates a real artificial grass installation from a weekend project. Before any digging starts, check the following:
- Soil type. San Diego yards often sit on clay or decomposed granite. Clay drains slowly and compacts differently than sandy soil. Know what you’re working with before you dig.
- Drainage. Look at where water already flows during rain. That pattern won’t disappear just because you added turf.
- Slopes and low spots. Note any dips where water pools. These need extra grading, not extra turf.
- Irrigation and utility lines. Call 811 before you dig, always. Sprinkler lines and buried cable are easy to miss and expensive to cut.
- Access and equipment. A narrow side gate might block a plate compactor. Know your access before you rent equipment.
- How the area will be used. A yard with dogs or kids needs different base depth and infill than a quiet side patch. Plan for the real use, not just the finished look.
Remove Existing Grass and Prepare the Ground
Can You Install Artificial Grass Over Natural Grass?
No. Don’t lay turf directly over live grass or sod. It’s the most common question we get, and it’s an easy one to answer wrong if you’re in a hurry. Grass, roots, and other organic matter under your turf will break down over time. As it decomposes, the ground shifts and sinks unevenly. That leads to bumps, poor drainage, and weed growth pushing up through your new lawn within a year or two.
If you’re searching for how to lay artificial turf on grass, here’s the short version: you don’t lay it on top. You remove the grass and roots first, then build a proper base. We cover this in full detail in our article on installing artificial turf over existing grass.
If you want to now about the base of artificial grass then read this article first ” The Best Base for Artificial Grass ”.
Excavate the Area to the Appropriate Depth
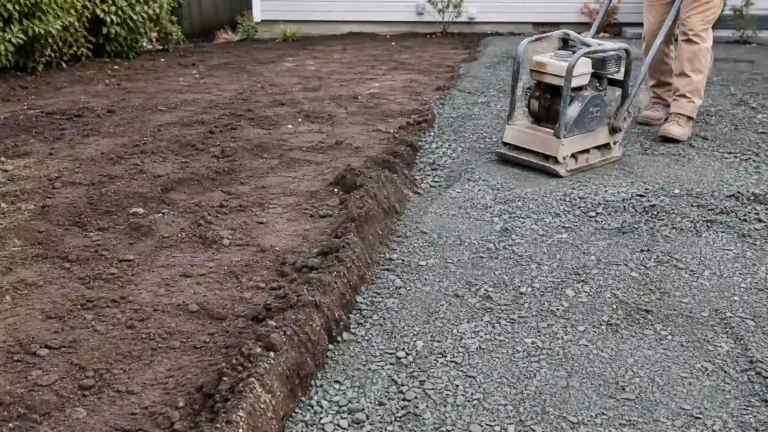
Most residential jobs call for excavating 3 to 4 inches, but that number isn’t fixed. It depends on your soil, your drainage needs, and how the space will be used. A dog run or high-traffic area often needs a deeper base than a decorative side yard. Don’t trust any guide, including this one, that gives you one number without asking about your yard first. Dig to your existing grade, and remove enough depth to fit your base material plus the turf system on top.
Grade and Compact the Soil
Why Soil Compaction Matters
Loose soil settles over time, even under a light layer of turf. As it settles, your lawn develops soft spots, dips, and an uneven surface. Compaction now saves you a repair later.
How to Create the Correct Grade
Slope the ground slightly away from your house and toward a safe drainage point, usually about a 1 to 2 percent grade. That’s roughly a quarter inch of drop for every foot of distance.
How to Identify Low Spots
Run a hose over the graded soil before moving on. Watch where water sits instead of running off. Fix those spots now.
Why Poor Compaction Causes Future Problems
Skipped compaction is one of the top reasons DIY turf jobs fail within a year. The surface looks fine on install day, then rippling and sinking show up months later once the ground has had time to settle under foot traffic and rain.
Install and Compact the Artificial Turf Sub-Base
What Is an Artificial Grass Sub-Base?
The sub-base is the layer of aggregate under your turf that gives it shape, stability, and drainage. It’s the part nobody sees once the project is done, and it’s the part that decides whether your lawn lasts ten years or two.
What Materials Can Be Used?
Crushed stone, Class II road base, and decomposed granite are the most common choices. Each drains and compacts a little differently.
How Thick Should the Sub-Base Be?
Thickness depends on your soil, your drainage needs, foot traffic, and the turf system you’re using. A general range is 2 to 4 inches, but a heavy-use area or poor-draining soil may need more.
Compact the Base in Layers
Add your aggregate in layers of about an inch or two, compacting each layer before adding the next. This builds a firmer, more even base than dumping it all at once.
Check the Finished Base Before Turf Installation
Walk the base once it’s compacted. It should feel firm underfoot, with no soft or bouncy spots. Fix any problem areas before the turf goes down. Once the grass is in place, this base is nearly impossible to fix without pulling everything up again.
Plan Drainage Before Laying the Turf
Drainage deserves its own section, not a footnote inside the base steps.
- How artificial turf drains water. Most turf backing is perforated, letting water pass through into the base below rather than pooling on top.
- Why the base matters for drainage. A well-compacted aggregate base lets water move down and away. A poorly built one traps it.
- What causes standing water? Flat grading, compacted clay with no aggregate layer, or blocked drainage points are the usual causes.
- How slope affects drainage. Even a small, consistent grade moves water toward a safe exit point instead of letting it collect.
- What if the soil drains poorly? Clay-heavy yards may need a deeper aggregate layer or a dedicated drainage channel. This is worth getting right the first time. We go into full detail in our guide on how artificial turf drains water.
Install a Weed Barrier Where Appropriate
A weed barrier, also called a weed membrane, goes over the compacted base before the turf. Overlap each strip by a few inches and anchor it down so it doesn’t shift. It should be porous enough to let water through while still blocking weed growth from below. It’s not a guarantee against every weed. Stubborn growth can still find its way through gaps or edges, but it cuts the problem down significantly.
Position and Relax the Artificial Turf
Roll Out the Turf
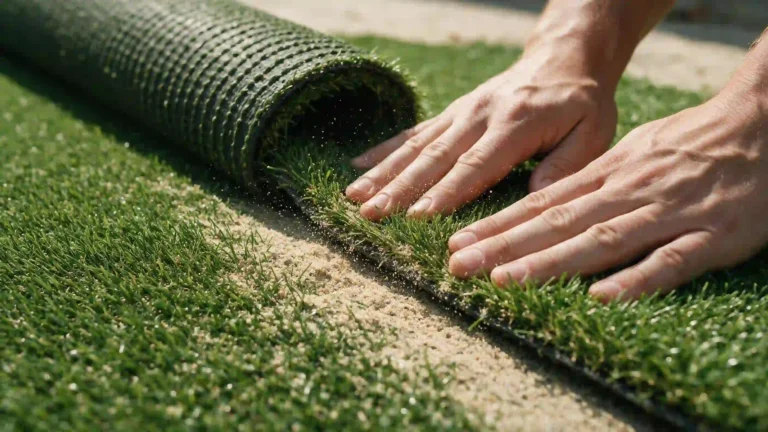
Lay your rolls across the base and let them sit in place before cutting anything.
Allow the Turf to Settle
Give the turf an hour or two in the sun before trimming. This lets it relax and lie flat, which makes cutting and seaming far more accurate.
Keep the Grain Direction Consistent
Check that all pieces face the same way before you commit to any cuts.
Avoid Dragging the Turf Across the Base
Dragging rolls across your prepared base can shift the aggregate underneath and undo your grading work. Lift and place instead.
Cut Artificial Grass Around Edges and Obstacles
Use a sharp utility knife and cut from the backing side, not through the fibers. Work slowly around curves, trees, posts, drains, and pavers. Cut a little long first, then trim back. It’s much easier to remove extra material than to fix a cut that’s too short.
Join Multiple Artificial Grass Rolls
Align the Grain Direction
Double check both pieces face the same way before joining them.
Prepare the Seam Edges
Trim both edges clean and straight so they meet without gaps or overlap.
Install Seam Tape
Slide seam tape underneath the joint, centered beneath both pieces.
Apply Adhesive Correctly
Spread adhesive evenly across the tape, following the product instructions for open time.
Bring the Turf Edges Together
Press both edges down onto the adhesive, keeping the seam tight without overlapping.
Inspect the Seam Before It Sets
Check the full length while the adhesive is still workable. A visible seam almost always means the edges weren’t trimmed straight or the pieces weren’t pressed evenly.
Secure the Artificial Turf
Secure the Perimeter
Fasten the outer edge with turf nails or landscape staples, spaced every 4 to 6 inches.
Secure Seams and High-Stress Areas
Add extra fasteners along seams and anywhere foot traffic will be heavy.
Protect the Grass Fibers While Fastening
Brush fibers aside before driving each nail so they don’t get pinned under the head.
Install Edge Restraint Where Needed
Along pavers, concrete, or garden beds, an edge restraint keeps the turf from shifting or lifting over time.
Apply and Brush Infill
What Does Artificial Turf Infill Do?
Infill weighs the turf down, helps the blades stand upright, and supports the backing under foot traffic.
Choose Infill According to the Application
Silica sand works for most residential lawns. Antimicrobial or zeolite infill helps control pet odor. Each has a different job depending on how the space gets used.
Distribute Infill Evenly
Spread it in light passes across the whole area rather than dumping it in one spot.
Brush the Turf Fibers Upright
Use a stiff push broom, working against the grain, to lift the fibers and settle the infill down between them.
Inspect the Finished Artificial Grass Installation
Before you call the job done, walk the full area and check for:
- An even surface with no soft or bouncy spots
- Secure, tight edges
- Seams that are flat and hard to spot
- Consistent grain direction across the whole yard
- No visible wrinkles or bunching
- No low spots where water could collect
- Water draining properly when tested with a hose
- Infill spread evenly, not patchy
- Fibers standing upright, not matted
- Clean transitions where turf meets pavers, beds, or walls
This turns your project from a set of finished steps into something you can actually verify.
You may also want to read these:
Common Artificial Grass Installation Mistakes
Most turf failures trace back to one of these:
- Installing over existing grass instead of removing it first
- Rushing or skipping excavation
- Not compacting the soil or base enough
- Getting the grade wrong, so water has nowhere to go
- Ignoring drainage until problems show up
- Poor seam alignment that leaves visible lines
- Cutting turf too short and leaving gaps at the edges
- Mixing grain direction between rolls
- Weak perimeter fastening that lets edges lift
- Infill spread unevenly across the yard
We break each of these down in full, with real repair costs, in our article on common artificial grass installation mistakes.
Can You Install Artificial Grass Yourself?
Many homeowners want to know how to install artificial grass without hiring a crew, and for a small, flat area, it’s doable with the right tools and patience.
When DIY Installation May Be Practical
A small patio, dog run, or simple flat yard with good soil and easy access is realistic for a capable DIYer.
When Professional Installation Makes More Sense
Larger yards, sloped sites, poor-draining clay soil, or anywhere near a home’s foundation get harder fast. Compaction equipment, correct grading, and clean seams take practice most homeowners haven’t had.
Why Site Preparation Is Often the Hardest Part
The turf itself is the easy part. Excavation, grading, and drainage are where most DIY jobs run into trouble, and they’re also the hardest part to fix after the fact.
How Long Does Artificial Grass Installation Take?
A small patio or dog run can often be finished in a single day. A standard backyard typically takes one to three days, depending on square footage, drainage work, and how many seams are needed. Larger or more complex yards, with slopes, poor soil, or tight access, can take longer. We cover full timelines by project size in our guide on how long artificial grass installation takes.
How to Maintain Artificial Grass After Installation
Once your turf is down, upkeep is simple. Brush high-traffic areas occasionally to keep fibers standing. Rinse off debris and pet waste as it happens. Check infill levels once or twice a year and top off if it’s thinning. Watch drainage after heavy rain to catch any issues early. For a full care routine, see our artificial grass maintenance guide.
Ready to Get Started?
Now you know how to install artificial grass the right way, from soil prep to final brushing. If you’d rather have a licensed local team handle it, SD Home Turf offers artificial turf installation services in San Diego County with free consultations and a 15-year warranty. Call (619) 467-7784 or request a consultation online to get started.
For more on turf material safety standards, see the Synthetic Turf Council. For water conservation guidance in San Diego County, visit the San Diego County Water Authority.
Artificial Grass Installation FAQs
Can you install artificial grass over existing grass?
No. Remove all grass, roots, and organic matter first, or you risk uneven settling and drainage problems later.
Do you need a sub-base for artificial grass?
Yes. The sub-base gives your turf stability, shape, and proper drainage. Skipping it is the top cause of early turf failure.
How deep do you dig for artificial grass?
Most residential jobs need 3 to 4 inches of excavation, but depth depends on your soil and how the area will be used.
Does artificial grass need a weed barrier?
In most cases, yes. A porous weed membrane under the turf cuts down weed growth while still letting water drain through.
How does artificial grass drain water?
Perforated turf backing lets water pass through into a compacted aggregate base below, which then carries it away.
Can artificial grass be installed on dirt?
Yes, with proper prep. The dirt needs to be cleared, excavated, graded, and topped with a compacted aggregate base first.
How long does artificial grass installation take?
A small area can take one day. A full backyard usually takes one to three days depending on size and site conditions.
Can you install artificial grass yourself?
For a small, flat, easy-access area, yes. Larger or sloped yards with drainage challenges are harder to get right without experience.
What is the best base for artificial grass?
Crushed stone, Class II road base, and decomposed granite are the most common choices, each compacting and draining a little differently.
How do you keep artificial grass from moving?
Secure the perimeter and seams with turf nails or staples every 4 to 6 inches, and use edge restraint along hard surfaces.